A Beginner’s Guide to Marketing Your Business on Facebook Groups
- Last Updated : August 17, 2023
- 5.5K Views
- 14 Min Read
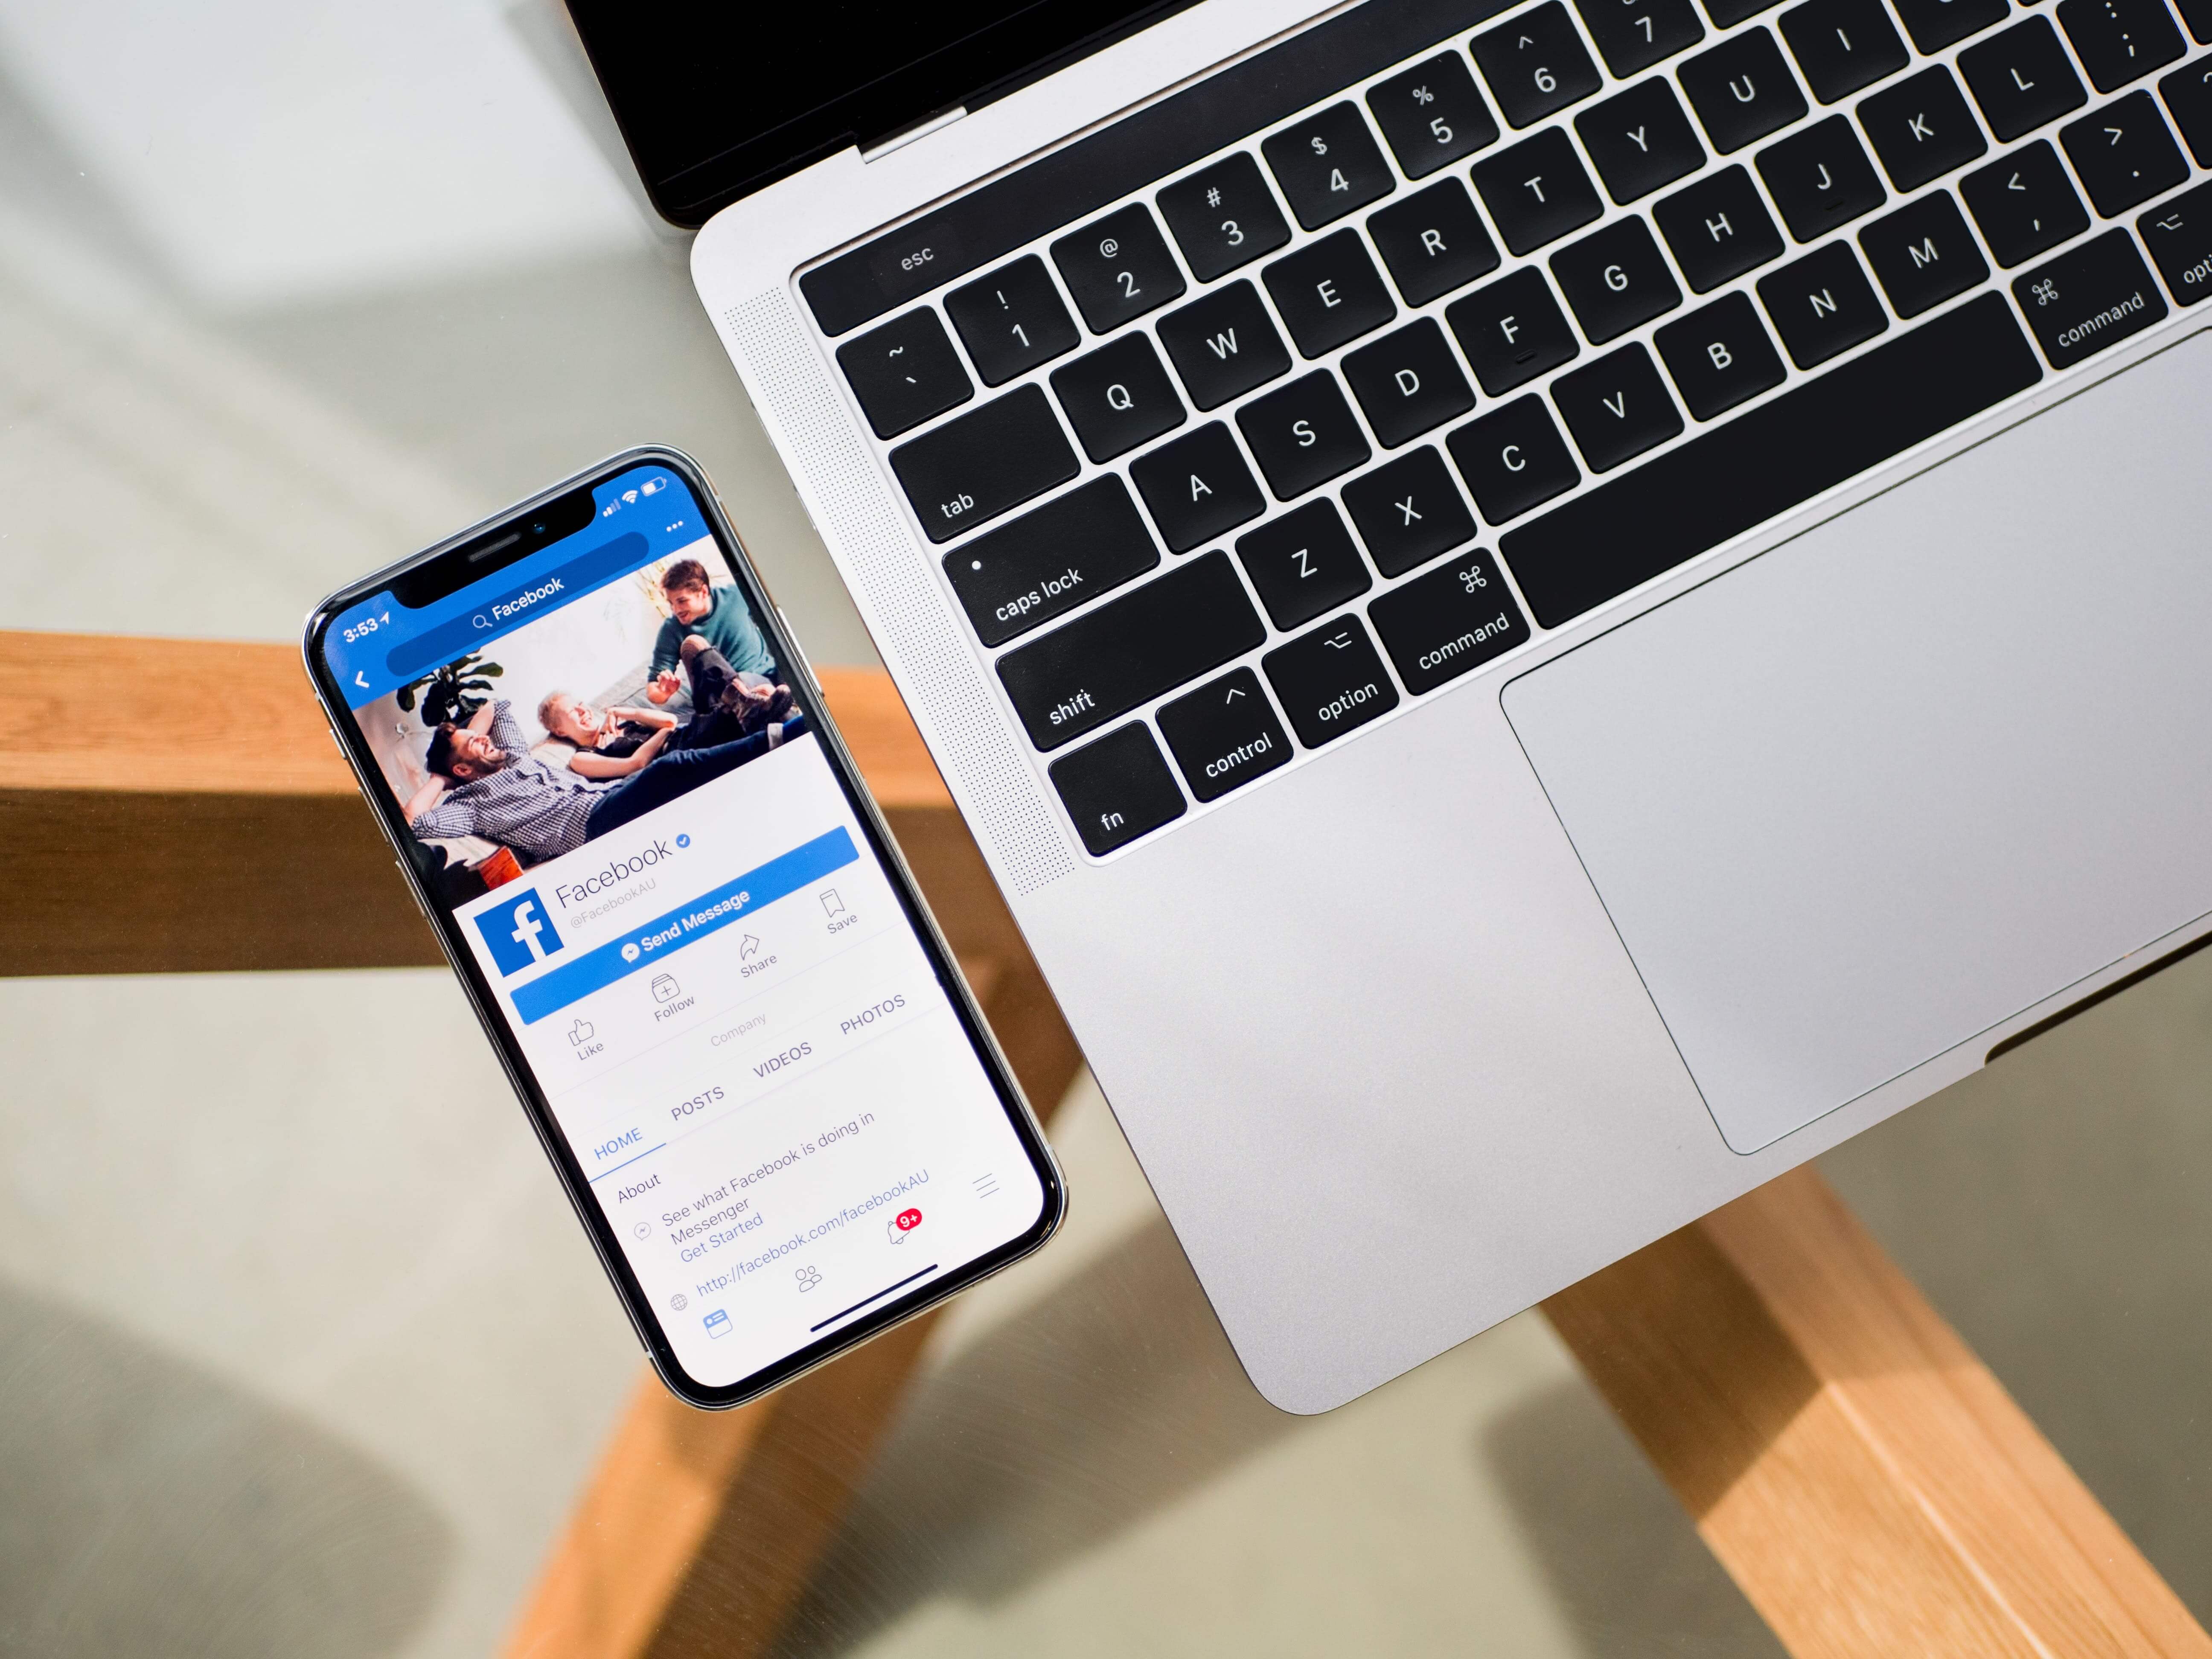
“Everywhere there are friends, there should be Groups.” says the head of the Facebook app, Fidji Simo.
Out of 2.4 billion active monthly users on Facebook, more than a billion of those are a part of Facebook Groups. Why? Because you want to share what you’re interested in with the people who are most interested in it, right?
Facebook Groups bring together other like-minded people and foster a healthy community for those who want to connect and exchange ideas.
The goal of Facebook, of late, has been to create more opportunities for everyone to have easy access to meaningful groups—groups that “quickly become the most important part of our social network experience and an important part of our physical support structure.”
Brands are starting to see the importance of this, and are creating spaces for more open and authentic interactions between people.
So, let’s dive right in to see how you can use Facebook Groups to maximize your business.
3 important questions to consider before you start
1. What’s your objective?
Whether you’re looking to monetize the group, create awareness for a special cause, or simply establish yourself as an expert—the more specific and precise your objective is, the easier it will be to attract a niche audience of people who resonate best with your group’s vision. It’s important to define your group’s persona and communicate what your group encompasses.
2. Who’s your group for?
It’s important to have a target audience in mind before creating a group. For instance, if you were interested in recipes for baking cupcakes, which group would you join?
“Baking for beginners” or “Cupcake recipes and decorations”?
I’m guessing the latter. This is because the second option caters more towards exactly what you’re looking for. So define your audience in such a way that when people become a part of your group, they feel an increased level of commonality and familiarity.
3. Is it easy to find?
People search for lots of things on Facebook, and when they do, they’ll probably try a combination of keywords to find what they’re looking for. If your group doesn’t have a specific name, it’s likely to get buried in hundreds of search results.
The chances of “cupcake recipes and decorations” popping up while searching for “baking cupcakes” is greater than searching for “baking for beginners”.
See what we mean? Ensure your group name is descriptive and keyword-rich to make it easier for people to discover you.
Now you’re set.
But first,
How is a Facebook Page different from a Facebook Group?
Your initial thoughts might be, “Isn’t a Facebook Page enough?” or “Do I really need a group?” or “Should I use both?”
To be completely honest, having both a Page and a Group will help. The Facebook algorithm that was introduced in 2018, gave groups an upper hand on your feeds, but that doesn’t rule out the importance of building engagement through your business page.
Although Pages and Groups help us stay connected, they serve to fulfill different purposes when it comes to content and engagements.
Now let’s take a look at why both are important.
A Facebook Page can be considered a listing for your brand in its most basic form.
According to Facebook, “Facebook Pages enable public figures, businesses, organizations, and other entities to create an authentic and public presence on Facebook.”
In simple terms, it’s where you put your business up for display—right at the forefront. Since Pages are public by default, it becomes easy for your audience and potential customers to search for it and eventually engage with it.
If you’re looking to broadcast information and generate more visibility for your business, you should have a Facebook Page, to begin with. You can grow your follower base and keep them informed by sharing your latest offers, business-related news, or any type of educational content. You can also promote the content on your Page through Facebook Ads.
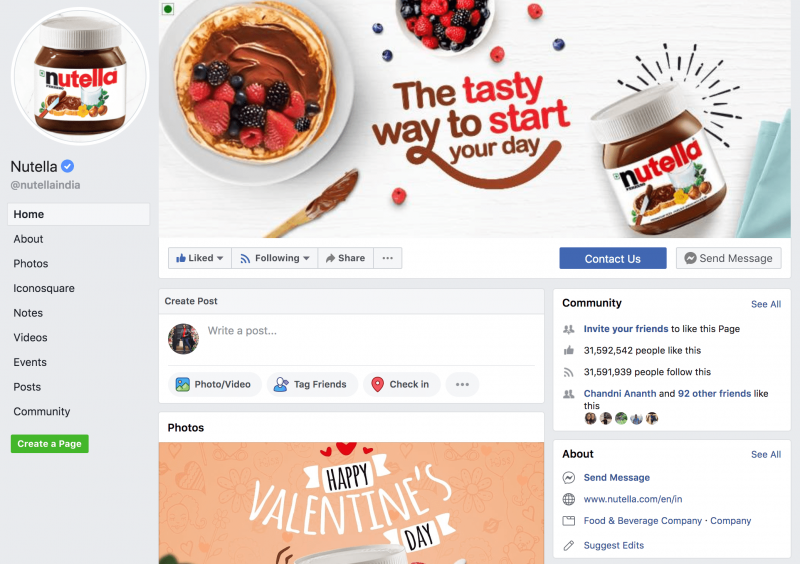
On the other hand, Facebook Groups “allow people to come together around a common cause, issue or activity to organize, express objectives, discuss issues, post photos, and share related content.”
For example, people interested in racing or photography can come together to collaborate around their chosen hobby—and this would primarily be an interest-focused group. People can also join your group if there’s a strong focus on your brand, and discuss best practices for using your product or service. In such groups, you can market your brand in creative ways, and provide solutions to those who’re looking for it.
Groups are cohesive. They’re great for building a community of people that have similar interests. You can nurture new relations, and expose yourself to more focused, high-quality conversations. Moreover, with the value that groups provide, people are inclined to engage in frequent discussions, and in doing so, they feel more comfortable.
Look at Groups as an added bonus to your Page. They’ll help generate the organic traction that you’re looking for.

Here’s a quick overview of the basic features of both:
Facebook Pages
- Admins can customize and assign roles and permissions to others
- Pages are always public, hence it’s easy for them to be discoverable on Google searches
- Page Insights help with viewing how Pages are performing—including audience demographics, impressions, and more
- Call-to-action buttons, such as Sign Up, Learn More, and Book Now can be added to generate more traffic
- Third-party applications can be added to customize the Page
- Emphasis on different sections, with tabs, templates, and more
- “Like” and “Comment” as your Page
- If you have 2 or more Pages for the same brand presence, you can merge them
- Admins can boost posts via Facebook Ads
- Pages can also join and participate in Facebook Groups
Facebook Groups
- As an admin, you can approve, delete, and manage posts
- Members can post, create polls, attach media files, and ask for recommendations
- Link multiple Pages to a group
- You can select the privacy setting for your group. There are three types—public, closed, and secret groups
- Filter membership requests on common categories like gender and location, and then accept or decline in one go
- Admins and moderators can publish and schedule posts for specific dates
- You can get real-time statistics around engagement, growth, and member activity with Group Insights
- Seamlessly receive notifications about the activities on the group
- Engage in buying or selling through For Sale Groups
- Send a reminder notification to accept or decline to those invited
Groups are getting increasingly bigger and more popular by the day. They’re tougher to manage than Pages, especially in the beginning, since you’ll have to put in a lot of work to get the engagement rolling. But, that’s why we’re here to help.
We’ll walk you through every step, from setting up groups to the best practices required to expand your presence. Once you’ve set the stage, all you’ll have to do is chime in every once in a while and moderate conversations.
How to create and manage a Facebook Group
Create your group
There are 3 ways to create a group from the web app. To start off, log in to your Facebook account.
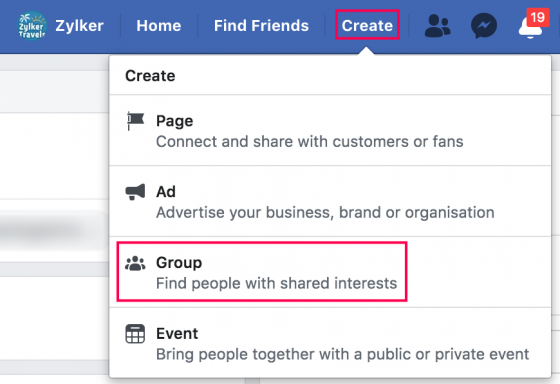
1. Head over to the top navigation bar, and click Create. Select the Group option.
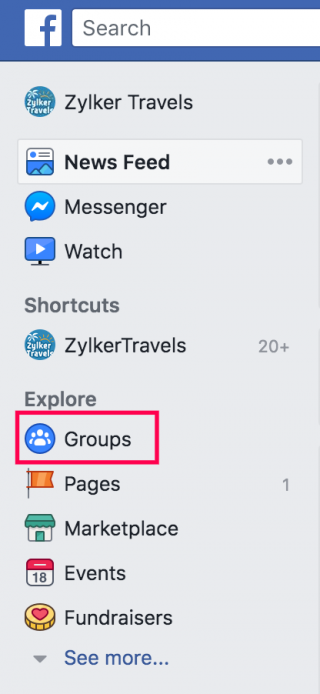
2. Find Groups on the left panel of your home page, and then click +Create Group.
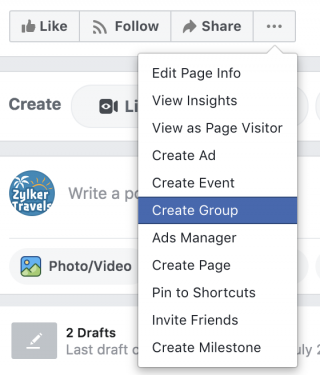
3. Or, if you want to create a group as your Facebook Business Page, hover over the ellipsis (…) beneath your cover photo, and choose Create Group.
4. After you select that option, you will see a pop-up asking you to fill out basic details about your group:

- Name your group: Like we discussed earlier, decide on a name that has the right keywords, and will help your audience find you easily.
- Add some people: You can add friends, colleagues, or employees to the group by either entering their names or sending them email invites. You’ll have to add at least one friend in order to create a group. You can also add a personalized note and customize your invitation.
- Select privacy: Currently, there are 3 types that you can choose from—public, closed, and secret. However, as of August 14th, 2019, Facebook announced that they’ll be bringing about changes to make it easier for people to understand the privacy settings. Here’s more information about it.
Until the new changes come into effect, let’s take a look at what the different types are.
Public groups:Anyone can find the group, view published posts without having to join, and see all the members who are a part of it.
Closed groups: Anyone can find the group by searching for it, but in order to see the posts inside, they will either have to send a request to join, or be invited by a member.
Secret groups: People can join these groups only if they are invited by members. It’s completely hidden from the public. They will not be able to search for it, or see any content in the group.
You’ll have to consider whether you want to choose this setting, as changing the privacy at a later point can be limiting for you. And after you set it, you can only change it once every 28 days.
If you have less than 5000 members, you’ll be able to switch to any privacy setting at any point in time. But if your group grows to have more than 5000 members, and it’s either a “closed” or “secret” group, you won’t be able to make it “public.” The members have understood that it is “private” in nature, and changing it suddenly would only disrupt the dynamics of the group.
Take a look at this resource to help answer any other questions you may have.
Tip: To access your group quickly, select the “Pin to Shortcuts” option and add it to the left panel on your Facebook Profile.

And when you’re finally ready, just hit Create!
Set up and personalize
Now, you’ll have to customize the look and feel of your group to give it the credibility it deserves.
Let’s start with the basics:
Upload a cover photo
The ideal size for group cover photos is 1,640 pixels wide by 856 pixels tall. Ensure the picture you choose is representative of your group’s interest. If the focus of your group is around your business, add your brand’s logo. Also, if you have any text on your image, it’s best to align it to the center, so that it doesn’t look awkward when people view it in the Groups section on the Facebook mobile app. Once you have a cover photo in place, you can click on it, and add a description just like you would for your Facebook Page or Profile.
Then make your way to Group Settings, by clicking (… More). You’ll have to fill out these details:

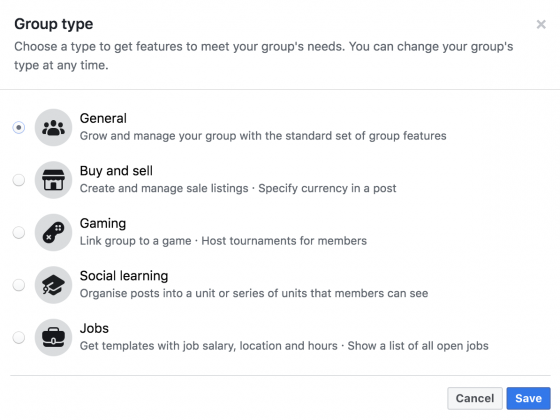
- Group Type: There are 5 types that you can choose from. This will help add a variety of tools and functionalities to your group.
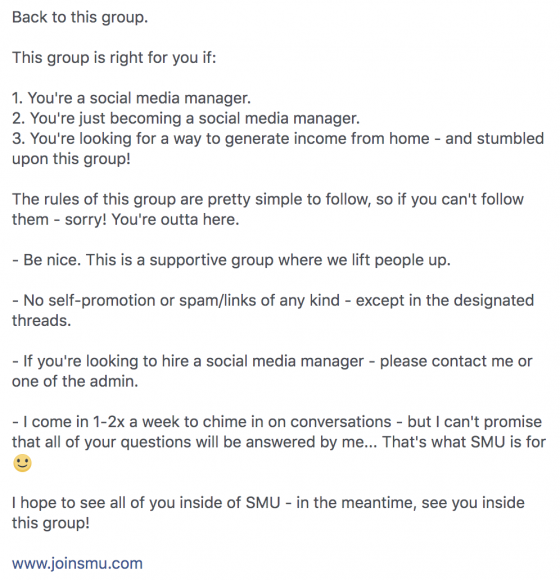
- Description: Remember, if your group is public or closed, people will be able to see what you’ve said. So, craft an explanation that clearly communicates the benefits of joining, and what kind of members it was created for. You can use up to 3000 characters for your description. Here’s an example from Become a Social Media Manager With Rachel Pedersen.

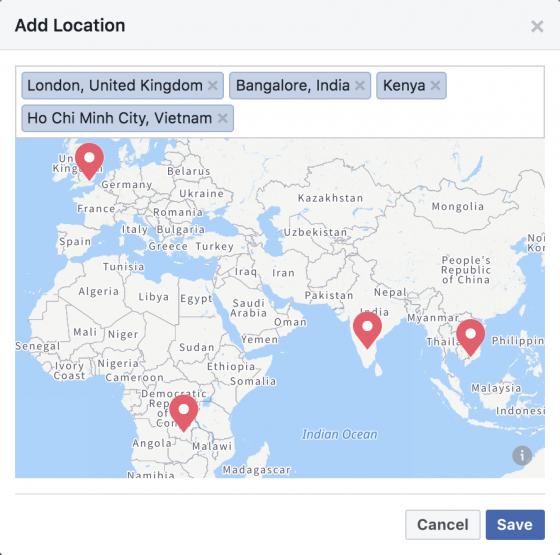
- Location: Make it simpler for people who are looking for Facebook Groups in your area to find you. You can also add multiple locations if your group is not tied to just one region.
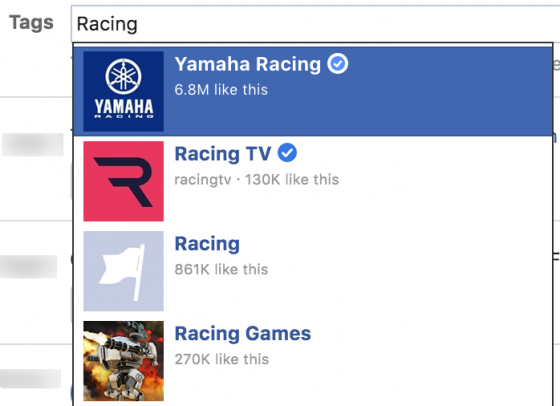
- Tags: Tags are keywords you want your group to rank for. It helps with discoverability when people search for topics or keywords they are interested in. It will also help potential members understand what your group is about. You can add up to 5 descriptive tags.
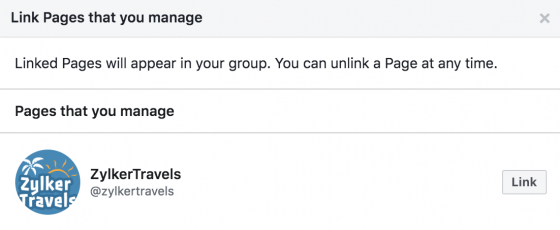
- Linked Pages: If you already have a Page for your business on Facebook, link it to your group to grow your community faster. Once you’ve linked your Page to the group, the users who have permission to manage your Page will also have admin rights to manage your group. This is great for brands who want to like, comment, and engage as their Facebook Page instead of their personal profile.
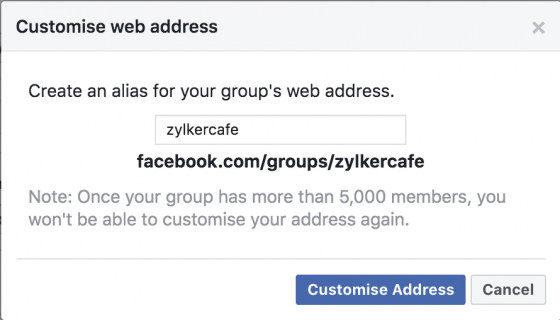
- Web address: Here’s your chance to create a unique URL for your group. You can share this with your friends, encourage word of mouth, or plug it in your presentations at conferences.
- Badges: This is a cool feature that lets you make your group members feel special and acknowledged. To encourage participation, you can enable these badges. They will then appear next to the members’ names, and will stay visible for a month. There are 10 types of badges that members can earn—Admin and Moderator, New Member, Group Anniversary, Conversation Starter, Founding Member, Conversation Booster, Visual Storyteller, Greeter, Link Curator, and Rising Star.

- Membership and posting permissions: Here you can set who can have control over posts and stories, and also pre-qualify membership requests—a great way to weed out trolls and spammers!

You can even create a short questionnaire (up to 3 questions) as part of the vetting process, and learn more about the people who want to join. Those who are really interested will take the time to fill it out. Keep your questions simple, though, because potential members will have only 250 characters to answer each one.

Once you’re done laying the foundation, hit Save. And, that’s it—you’ve crossed your first checkpoint!
Establish guidelines and protocols
You can dictate rules and establish which direction you’d like your group members to take. Although you don’t need to lay out any ground rules—most groups don’t—it’s often best to play it safe. Especially if you’re a business, sharing the purpose and objective of your group will help keep everyone on the same page. Those who abide by them can get rewarded—remember badges?—and those who create a hassle can get booted. Facebook also allows you to add a personalized note and notify members who violate your rules.
You don’t have to feel bad about being stringent. This is your group, and it’s up to you to make it as legitimate as you can.
You can find this feature in the Moderate Group tab. After you’re done charting out your rules, you will see that it’s placed in the About section of your description—easily noticeable by all.

Ways to grow your Facebook Groups and get more engagement
After you’ve officially set it up, it’s now time for you to do the actual heavy lifting.
1. Recruit more admins and moderators
In your initial days, you may struggle to manage your group’s activity all by yourself. It’s best to ask others to help you out. If you have a dedicated team of people who are strongly aligned to the cause of the group, make them admins or moderators. Or if you identify members who reflect the principles laid down by the group and are responsible, give them the opportunity. As your group inches its way to crossing the 500 or 1000 member mark, you’ll see that it’s starting to take on a life of its own. Until then, create a panel of admins and moderators, and prepare to put in hours of consistent engagement.
2. Post regularly and offer more value
How can you make your group stand out? If you have a similar Page around your brand, how can you make sure that the value they get from your Page would be different from your group?
To kick start the engagement on your group, you will have to do most of the talking. Publish content that resonates best with your members, and try to post at least 4-5 times a week.
Here are some tips:
- Welcome members: You can welcome new members every Wednesday (#WelcomingOnWednesdays), and ask them to introduce themselves. A simple way to break the ice, huh?

- Get pollin’: Sometimes people get lazy. Polls are one of the quickest ways of getting instant engagement, because a) it requires just a single tap to express ones’ opinion b) it doesn’t use up too much of your mental energy. If you want to decide which topic to debate in your next meet up, poll away!

- Make announcements: It could be your latest business accomplishment, a new product lineup, or simply the venue where you’ll be holding your next quiz session at.

- Use media to your advantage: Visuals appeal to everybody. There’s no doubt about that. Toss in some of your best memes, videos, and pictures to increase participation in your group.

These are just some of the ways you can get things going. I’d also suggest that you ask questions in the group, respond to members, or simply like and comment on their posts. This will help build trust among members, and make them feel like they’re being heard.
You can also use a social media tool to plan your posts on a calendar and schedule them to go live on your group at a date and time of your choice. If you’re taking a vacation—or have something important to attend to at the last minute—using a third-party application will help you make up for lost time.
3. Tag people and encourage participation
Does your colleague come from the world of automobiles? Or maybe you know someone who’s an expert in content writing?
It’s always a good idea to introduce new people who can add something substantial to conversations. This can be flattering—it shows that their opinions matter and are valued. And if they aren’t completely confident in themselves, they can tag someone who might be able to help out. And it works great for word-of-mouth marketing for your group, too!
4. Keep an eye on analytics to see what’s working
Once you have a good grasp over publishing content and increasing engagement for your group, you’ll want to know how your group is performing. Facebook Group Insights will give you all the information you need—popular times to post, top contributors, audience demographics, post-performance metrics, and more.
Unlike Page Insights, the Group Insights tab does not appear immediately. As an admin, you can access Group Insights only if you have 250 members or more.
There are 3 sections to it:
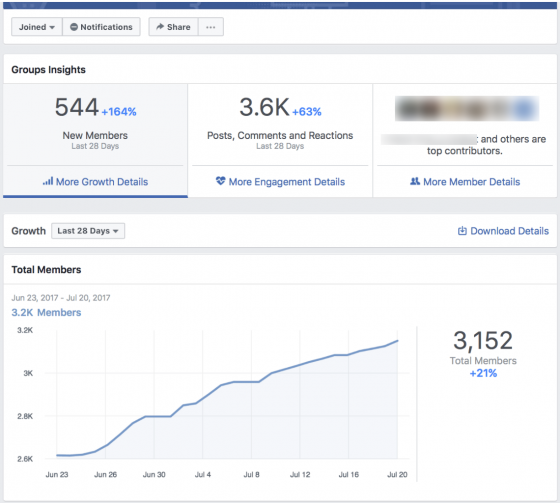
- Growth:
You can view metrics to see the total number of members, and view growth details about members who join.
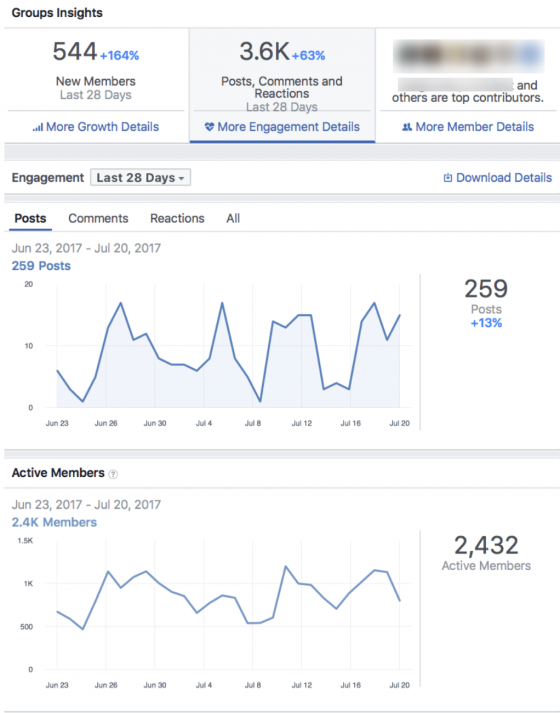
- Engagement:
To get an idea of whether your community has good momentum going or not, you can take a look at these stats: posts, comments, reactions, the number of active members, popular days and times to post, and the best performing posts.
- Member:
The quickest way to determine whether your target market belongs to the group is to check reports shown in this tab. You’ll get information about age and gender, top cities, countries, and even top contributors to your group.

With the help of these metrics, you’ll have a better understanding of what content is working best, and make better decisions for generating the maximum amount of engagement for your group.
5. Discover similar groups to cross-promote yours
Before you start promoting yourself or your business in other groups, take a quick glance at the in-house rules. For instance, some groups may have a dedicated day around this theme: Promo Tuesdays. That’s your cue to join in and participate. But simply hopping in and unleashing a barrage of promoted links will do you no good. Stay awhile, offer real solutions, take part in discussions, and if you find an opportunity to plug your service, do so naturally. There’s no hurry. After all, you’ll be interacting with people that share common interests. You don’t have to try too hard to convince your target audience. And especially after we’ve spoken about how to curb spammers—you wouldn’t want to end up becoming one!
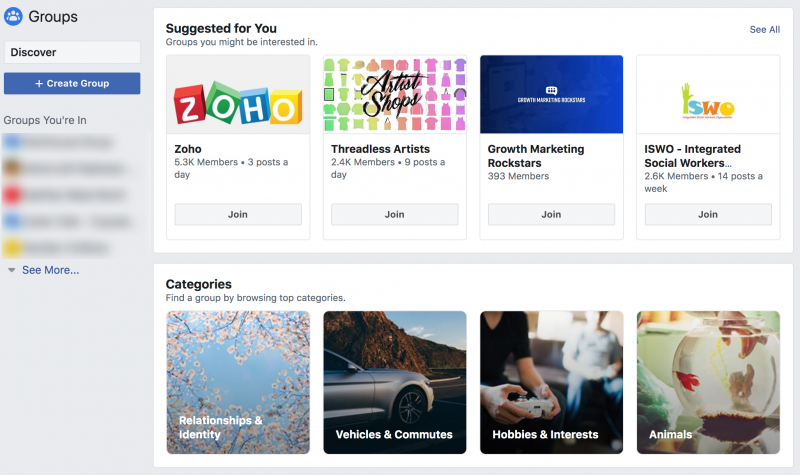
You can search for groups by entering keywords or topics that are similar to yours—or just head to the Discover tab, and you’ll come across many new suggestions and popular groups near you.
More about Facebook and their services
In this blog, we’ve covered the basics of getting started with Facebook Groups. Marketing on groups is just a tiny fraction of the kind of brand-building opportunities that you can take up on Facebook. It requires a continuous investment of your time and effort to get your group off the ground and keep it running.
If you’re looking to expand your brand’s presence, don’t just stop with one platform. Explore messaging apps like Whatsapp and Messenger, where you can chat with potential customers in real-time, and establish meaningful relationships.
And of course, how can we forget about Instagram? With over 600 million+ people seeking out new brands, just imagine the kind of reach your business can have on this platform. From start to finish, we’ve covered everything you need to know about Instagram marketing. So check it out!
Did you find this blog useful? Know of any good brands acing marketing on Facebook Groups? Let us know in the comments below. We’d love to hear from you!
 Ritika
Marketing. Musings. Maple syrup.
Product Marketer at Zoho Social.
